
Client ID and Client Secret for Business Central from Azure
This configuration lets us identify an application to Business Central and decide exactly which permissions it will have.


When we want to connect an external application or service to Business Central without depending on a user account, one of the most common options is a Microsoft Entra application with Client ID + Client Secret authentication.
This configuration lets us identify an application to Business Central and decide exactly which permissions it will have.
In this article, we will focus only on creating the application and configuring it in Business Central, since its uses can vary considerably.
Registering an application in Microsoft Entra
First, we need an account with sufficient permissions to register applications and grant the necessary permissions. From Azure, we open App registrations or go directly to:
https://portal.azure.com/#view/Microsoft_AAD_RegisteredApps/ApplicationsListBlade
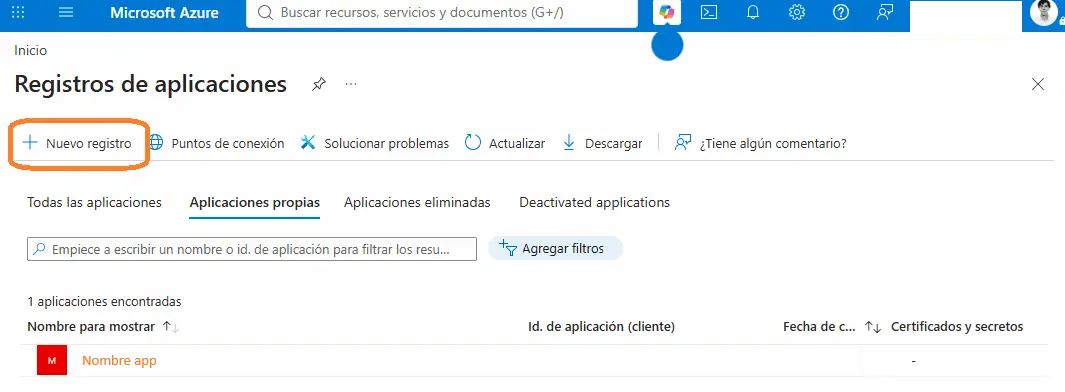
We select New registration and create a new application.
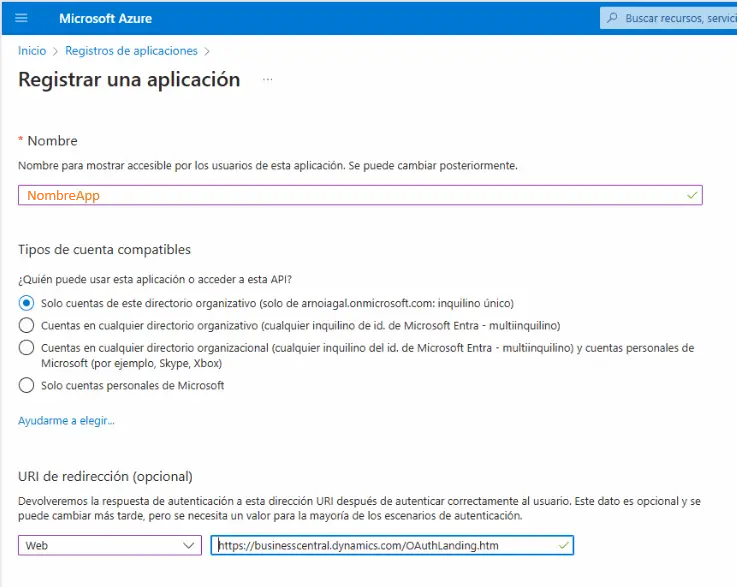
In this case, we also configure the following redirect URI:
https://businesscentral.dynamics.com/OAuthLanding.htmThis URI is used in interactive authentication scenarios with Business Central. It is not strictly necessary for the Client ID + Client Secret authentication covered in this article, since there is no interactive user sign-in, but we can leave it configured anyway.
Configuring Business Central permissions
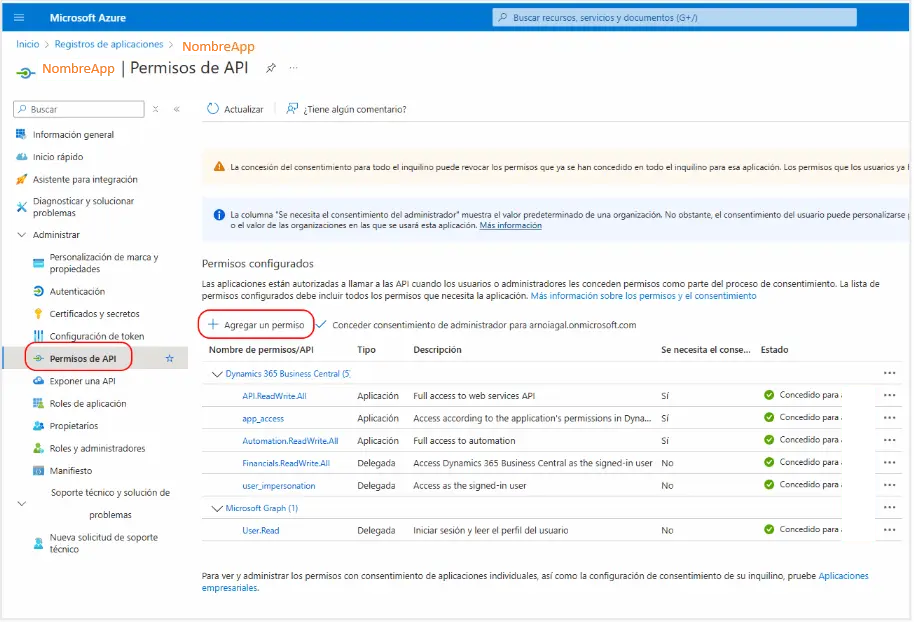
In the application we just created, we open API permissions and select Add a permission.
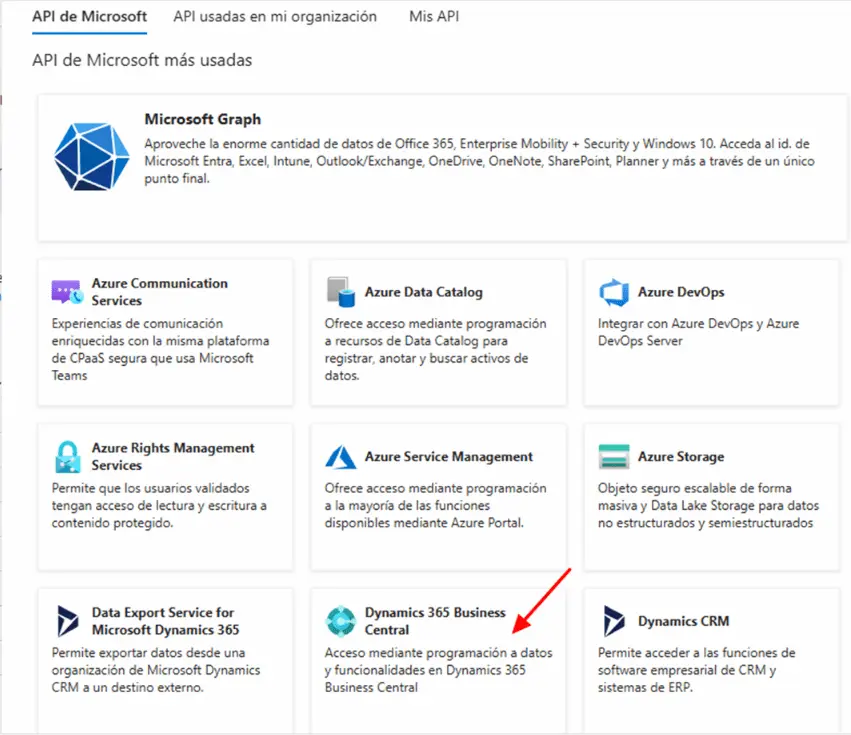
We search for Dynamics 365 Business Central.
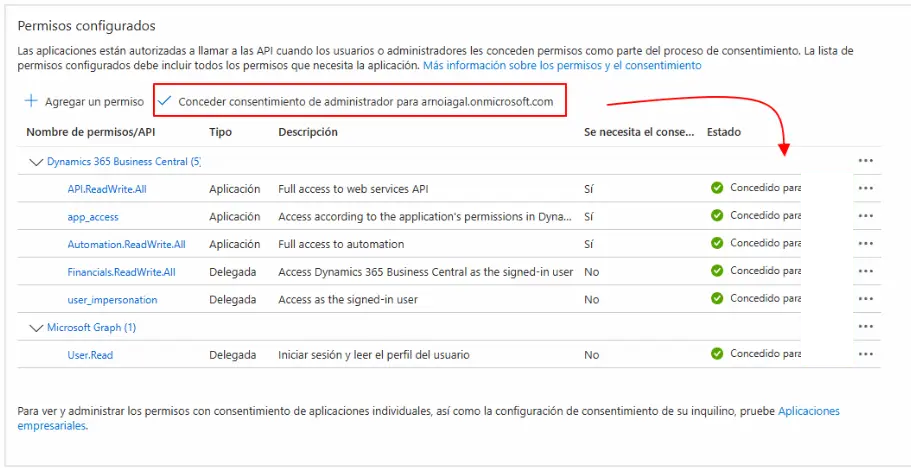
Since we want the application itself to authenticate, we need Application permissions. The most common permission for working with Business Central APIs and web services is:
API.ReadWrite.All
If we later need to work with the Business Central Automation APIs, we may also need additional permissions such as:
Automation.ReadWrite.All.
After configuring the permissions, we must grant admin consent. The result should look similar to this:
Creating the Client Secret
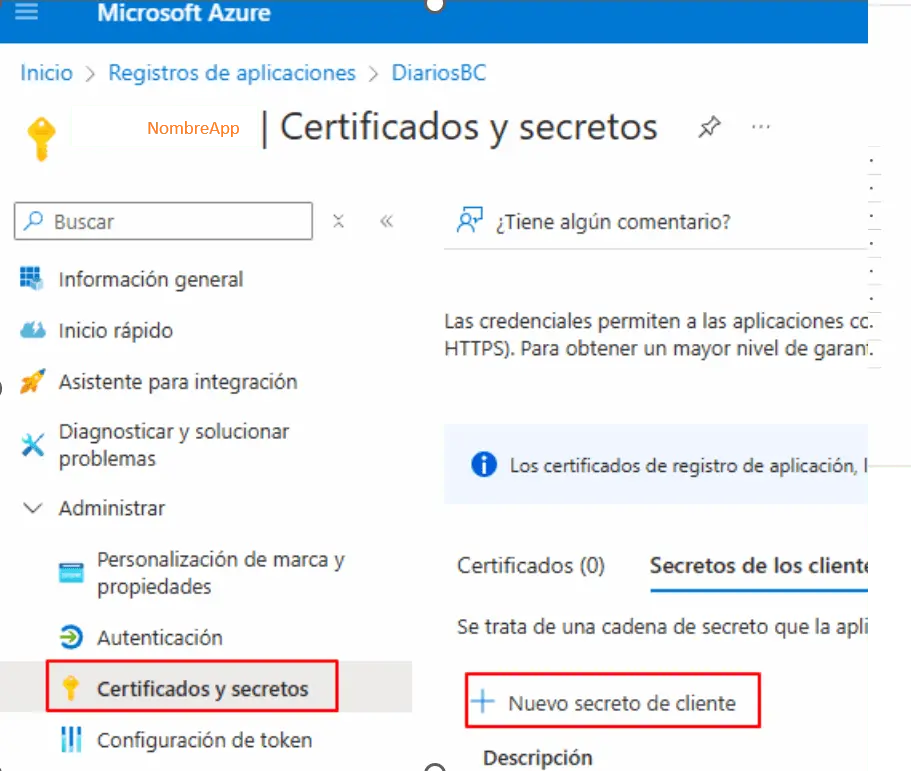
The next step is to create the secret our application will use to authenticate, through “Certificates & secrets” and “Client secrets”:
After creating it, we will see a screen similar to this:
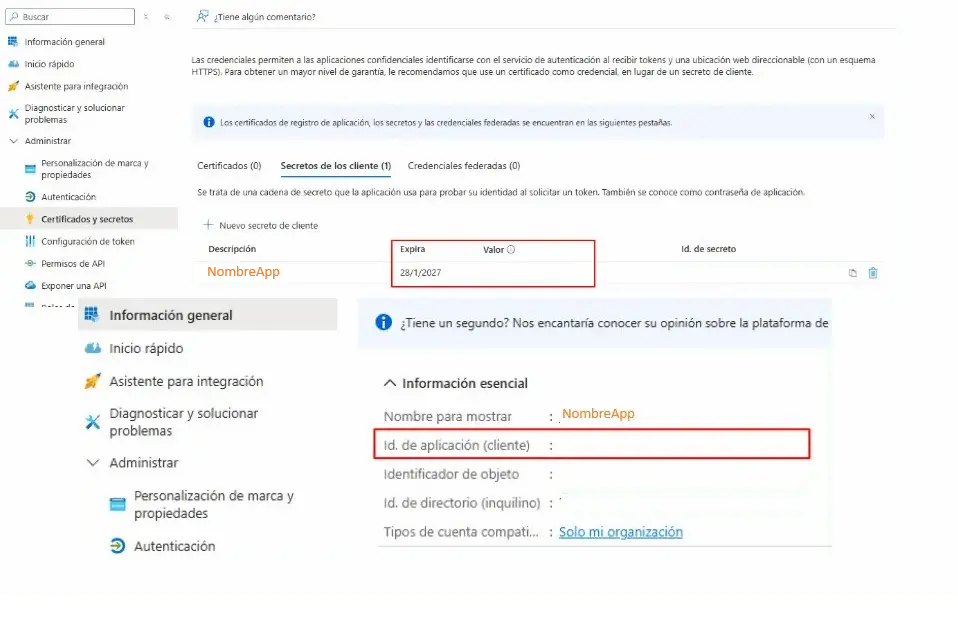
This step matters because the full secret value is only shown when it is created. If we close the screen without saving it, we will have to generate a new one.
We should also keep track of its expiration date. When the secret expires, integrations that depend on it will stop authenticating until we configure a new one.
Note: The Client ID is the Application (client) ID field of our application, which we will need later in BC.
Granting the application access in Business Central
The application now exists in Microsoft Entra, but we still need to tell Business Central that it may access the environment. We do this step inside Business Central:
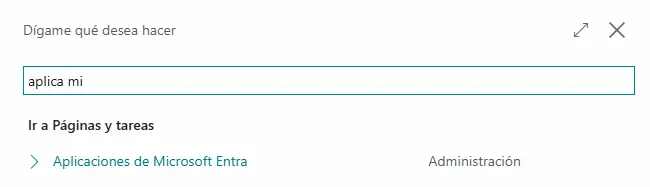
We create a new record using the Application ID as the Client ID and enable the application to assign its corresponding permissions.
These permissions use standard BC permission sets. In effect, we are creating a technical identity that will access Business Central from external services. Depending on the permissions we assign, it will be able to read, modify or execute actions on particular records.
Ideally, we should create a dedicated permission set for these applications so that their access remains under control. An application used exclusively to query general ledger entries should not have permission to modify customers, items or system settings.
Uses
Once we have the Client ID + Client Secret and the application configured in Business Central, we can use these credentials in many scenarios. For example, we can connect from Power Query, consume standard Business Central APIs, access OData web services, develop integrations with external applications or run automated processes without depending on a person signing in.
That is the main advantage: the integration is no longer tied to a particular user, and we can control its permissions independently.
An idea to keep thinking about.
Explore more articles →